Fuzzing a Pixel 3a Kernel with Syzkaller
Table of Contents
Preface #
Syzkaller has been the buzzword ever since I started learning kernel exploitation. It’s the go-to tool for kernel fuzzing and has harvested countless bugs in various kernels like Linux, Windows or even XNU (check out the list of found bugs here).
However, setting up Syzkaller isn’t a straight forward task. To navigate Syzkaller through the maze of the kernel binary, one has to compile the kernel with Kernel Address Sanitizer(KASAN) and Kernel Coverage(KCOV), wrap it in a fresh boot image and flash to the device. It was a puzzling process with many caveats await.
This article is nothing spectacular but a truthful record of my Android kernel fuzzing setup on Pixel 3a. The setup was tested on the latest android-10.0.0_r30 (security patch level 2020-03-05) and kernel android-msm-bonito-4.9-android10 (last commit e39531f0f61ba9c074d712b539897679b76a0ef5 on 2020-01-08).
What’s new in 2020 #
If you have done some googling, soon you should find this Android team’s official guide on “Building a Pixel kernel with KASAN+KCOV”. Spoiler alert: it’s outdated. The guide used Pixel XL(marlin) as a test device, which was released way back in October 2016. Moreover, Syzkaller has a few specific setup requirements which we have to carefully integrate into our kernel building process.
Here are a couple of key things that closely relevant to our fuzzing setup:
THE KERNEL MUST BE COMPILED ON THE SAME MACHINE RUNNING SYZKALLER
I didn’t notice this until the very late stage. Previously I was building the kernel on a remote server(more powerful), flash it to the device and connect it to another local machine running Syzkaller. However, Syzkaller failed to create any coverage report in this setup.
It turned out that CONFIG_DEBUG_INFO (a kernel option that adds debug symbol to the kernel, as required by Syzkaller) will put the full path of kernel source files into the final image. Syzkaller extracts these file paths directly from the kernel and uses them to retrieve the source code on the localhost. Obviously, these remote paths won’t exist locally. How to avoid this? Build the kernel on the machine that runs Syzkaller.
A final farewell to GCC
GCC is no longer supported in Android’s toolchain in 2020. If you follow the guide and compile kernels with Android’s GCC toolchain, you’ll see this message:
> make clean
...
Android GCC has been deprecated in favor of Clang, and will be removed from
Android in 2020-01 as per the deprecation plan in:
https://android.googlesource.com/platform/prebuilts/clang/host/linux-x86/+/master/GCC_4_9_DEPRECATION.md
But why switch to Clang? As answered by Android’s team here, Clang build provides many sanitizer(integer overflow sanitizer, address sanitizer, etc.), better diagnostics and stronger security features(control flow integrity and safe stack). In fact, Google has been shipping Clang-built kernels since the release of Pixel 2 (Oct 2017).
Because the Pixel 3a kernel source is written with Clang in mind, it’s of our best interest to keep the setup as close to Google as possible to reduce potential issues. Hence, we will be using Android’s official Clang toolchain in this guide.
Build-in KASAN config in the Android kernel
In Google’s old guide, you have to manually reconfigure the kernel to enable some options (e.g.
CONFIG_KASAN=y). Now things just got easier: new Pixel 3a kernel has provided a default build configbuild.config.bonito_kasanunder the root directory, which conveniently helps you to setup all the kernel options. We will talk about how to make use of this later.Pixel 3a has drivers as kernel modules
Pixel 3a’s Wifi and touch screen driver are provided as kernel drivers. How do we know? Enter
lsmodon a Pixel 3a should give you the answer.sargo:/ # lsmod Module Size Used by wlan 9433088 0 synaptics_dsx_rmi_dev 28672 0 synaptics_dsx_test_reporting 53248 0 synaptics_dsx_fw_update 49152 0 synaptics_dsx_core 61440 3 synaptics_dsx_rmi_dev,synaptics_dsx_test_reporting,synaptics_dsx_fw_updateWhy does this matter to us? Because later you will notice wifi and touch screen stop working on our customised kernel due to kernel’s module versioning(CONFIG_MODVER) and vermagic mechanism.
(2021/03 Update) More details is covered in this follow-up post , including guides on how to fix the issue.
Building a pixel 3a kernel with KCOV+KASAN #
To summarise, you’ll have to:
Download AOSP and proprietary binaries
Setup sargo kernel and the Clang toolchain
Modify the kernel
Add the kernel to the boot image and build AOSP
Testing KASAN setup
Download AOSP and proprietary binaries
Check AOSP version here(https://source.android.com/setup/start/build-numbers#source-code-tags-and-builds) and take note of the tag. Then download AOSP:
> cd ~ & mkdir aosp_10 & cd aosp_10
> repo init -u https://android.googlesource.com/platform/manifest -b android-10.0.0_r30
> repo sync
Find the proprietary binaries for Pixel 3a here (https://developers.google.com/android/drivers#sargo) and download all of them.
> cd ~ & mkdir vendor_dl & cd vendor_dl
> wget https://dl.google.com/dl/android/aosp/google_devices-sargo-qq2a.200305.002-c6903416.tgz
> wget https://dl.google.com/dl/android/aosp/qcom-sargo-qq2a.200305.002-da823dc1.tgz

#extract vendor image
> tar zxvf google_devices-sargo-qq2a.200305.002-c6903416.tgz
> ./extract-google_devices-sargo.sh
> tar zxvf qcom-sargo-qq2a.200305.002-da823dc1.tgz
> ./extract-qcom-sargo.sh

# copy extracted vendor directory to aosp's root
> cp vendor ../aosp_10
Check device dependencies. Make sure your device meets the requirements (You can find them in the Settings).

> cat vendor/google_devices/sargo/android-info.txt
require board=bonito|sargo

require version-bootloader=b4s4-0.2-6066691


require version-baseband=g670-00036-200114-B-6134202
Setup sargo kernel and the Clang toolchain
Goto https://android.googlesource.com/kernel/msm/+refs check available branches. Here we choose the latest
android-msm-bonito-4.9-android10branch.> cd ~ & mkdir bonito-kernel-4.9-android-10 > cd bonito-kernel-4.9-android-10/ > git clone https://android.googlesource.com/kernel/msm > cd msm # switch to desired branch > git checkout android-msm-bonito-4.9-android10Following AOSP’s official guide (https://source.android.com/setup/build/building-kernels#downloading), we can now download the nicely wrapped Clang toolchain in one shot.
> cd ~ & mkdir toolchain & cd toolchain
> repo init -u https://android.googlesource.com/kernel/manifest -b android-msm-bonito-4.9-android10
> repo sync
> ls -lah
total 32K
drwxrwxr-x  7 yuli yuli 4.0K Apr  2 12:50 .
drwxr-xr-x 29 yuli yuli 4.0K Apr 13 19:05 ..
drwxrwxr-x  9 yuli yuli 4.0K Mar 30 12:22 build
lrwxrwxrwx  1 yuli yuli   61 Apr  2 00:34 build.config -> private/msm-google/build.config.bonito_no-cfi
drwxrwxr-x  4 yuli yuli 4.0K Apr  2 12:50 out
drwxrwxr-x  3 yuli yuli 4.0K Mar 30 12:22 prebuilts
drwxrwxr-x  4 yuli yuli 4.0K Mar 30 12:22 prebuilts-master
drwxrwxr-x  4 yuli yuli 4.0K Mar 30 12:22 private
drwxrwxr-x  7 yuli yuli 4.0K Mar 30 12:22 .repo

# private contains a copy of default pixel 3a kernel, delete this since we want to supply our selected branch
> rm -rf private
# remove the default config
> rm build.config
Go to the folder that contains the kernel we have just downloaded, open
build.config.bonito_kasanand updateKERNEL_DIR.KERNEL_DIRshould be a relevant path starting from thetoolchainfolder.# file build.config.bonito_kasan DEFCONFIG=bonito_defconfig # our kernel path KERNEL_DIR=../bonito-kernel-4.9-android-10/msmLastly, add this file as a symlink to the toolchain folder.
> ln -s build.config.bonito_kasan ../toolchain/build.configModify and build the kernel
Since KASAN changes the kernel memory layout, we have to change it to a KASAN-specific setting. Open
aosp_10/device/google/bonito/BoardConfig-common.mkand comment/uncomment as follows:# ifeq ($(filter-out bonito_kasan sargo_kasan, $(TARGET_PRODUCT)),) BOARD_KERNEL_OFFSET := 0x80000 BOARD_KERNEL_TAGS_OFFSET := 0x02500000 BOARD_RAMDISK_OFFSET := 0x02700000 BOARD_MKBOOTIMG_ARGS := --kernel_offset $(BOARD_KERNEL_OFFSET) --ramdisk_offset $(BOARD_RAMDISK_OFFSET) --tags_offset $(BOARD_KERNEL_TAGS_OFFSET) # else # BOARD_KERNEL_TAGS_OFFSET := 0x01E00000 # BOARD_RAMDISK_OFFSET := 0x02000000 # endifAdditionally, Skykaller requires a dozen kernel configs as described here. I chose the first half without some “debugging configs”(some will cause the device to fail boot). Notice you will have to make changes through
build.config.bonito_kasanbecause the build scriptbuild/build.shwill check the integrity of the original defconfig file before proceed.build.config.bonito_kasan @@ -14,13 +14,34 @@ function update_kasan_config() { -d CONFIG_KASAN_OUTLINE \ -d CONFIG_RANDOMIZE_BASE \ -d CONFIG_CC_WERROR \ --set-val CONFIG_FRAME_WARN 0 \ + -e CONFIG_KCOV_INSTRUMENT_ALL \ + -e CONFIG_KCOV_ENABLE_COMPARISONS \ + -e CONFIG_DEBUG_FS \ + -e CONFIG_DEBUG_INFO \ + -e CONFIG_KALLSYMS \ + -e CONFIG_KALLSYMS_ALL \ + -e CONFIG_NAMESPACES \ + -e CONFIG_UTS_NS \ + -e CONFIG_IPC_NS \ + -e CONFIG_PID_NS \ + -e CONFIG_NET_NS \ + -e CONFIG_CGROUP_PIDS \ + -e CONFIG_MEMCG \ + -e CONFIG_USER_NS \ + -e CONFIG_FAULT_INJECTION \ + -e CONFIG_FAULT_INJECTION_DEBUG_FS \ + -e CONFIG_FAILSLAB \ + -e CONFIG_FAIL_PAGE_ALLOC \ + -e CONFIG_FAIL_MAKE_REQUEST \ + -e CONFIG_FAIL_IO_TIMEOUT \ + -e CONFIG_FAIL_FUTEX \ -d LTO \ -d LTO_CLANG \ -d CFI \ -d CFI_PERMISSIVE \ -d CFI_CLANG \Once the preparation is done, you can build the kernel by a simple one-liner.
# build the kernel, using build.config by default
> cd ~/toolchain & ./build/build.sh

# copy the kernel binary to AOSP source tree
> cp ./out/bonito-kernel-4.9-android-10/msm/arch/arm64/boot/Image.lz4 ~/aosp_10/device/google/bonito-kernel/
Add the kernel to the boot image and build AOSP
> cd ~/aosp_10
> source build/envsetup.sh
> lunch aosp_sargo-userdebug
# build all images
# Although we only need boot.img, but later we need adb root access
# to open dmesg and check kasan output. Hence for the first time round,
# we'll have to build everything and flash all images to the device
> m -j48

# in future if just want build boot.img
> m bootimage -j48
[100% 13921/13921] Target boot image from recovery: out/target/product/sargo/boot.img
Testing KASAN setup
As mentioned earlier, if your device wasn’t running in
userdebugflavor, you have to flash all images(built from the last step) first. You can download the factory image from here(https://developers.google.com/android/images), and use the provided[flashall.sh](http://flashall.sh)script to conveniently flash all images to the device.Boot from our new kernel and print out the kernel message. You should see this line of output:
kasan: KernelAddressSanitizer initialized.> adb reboot fastboot # just reboot from our new kernel without flashing it > fastboot boot boot_no_modver.img # after reboot > adb root & adb shell sargo:/ # dmesg
Running Syzkaller #
Finally, the Syzkaller: ) ~~The good news is that running Syzkaller is a much easier task. Syzkaller supports adb out-of-the-box so all you have to do is to plug in your device and enjoy fuzzing. (~~No. the official setup guide covered only a bare minimum to get Syzkaller running. More have to be done to correctly enable Syzkaller’s coverage report.)
Let us follow the official guide to setup first. Notice that Syzkaller won’t build for TARGETOS=arm64 on OS X so you should find a Linux machine and continue this guide.
# download cross-compile toolchains
> sudo apt-get install wget git g++-aarch64-linux-gnu gcc-aarch64-linux-gnu
# download and build Syzkaller
# follow https://github.com/google/syzkaller/blob/master/docs/contributing.md
> wget https://dl.google.com/go/go1.13.8.linux-amd64.tar.gz
> tar -xf go1.13.8.linux-amd64.tar.gz
> mv go goroot
> mkdir gopath
> export GOPATH=`pwd`/gopath
> export GOROOT=`pwd`/goroot
> export PATH=$GOPATH/bin:$PATH
> export PATH=$GOROOT/bin:$PATH
# build syzkaller
> go get -u -d github.com/google/syzkaller/...
> cd gopath/src/github.com/google/syzkaller/
> make TARGETOS=linux TARGETARCH=arm64
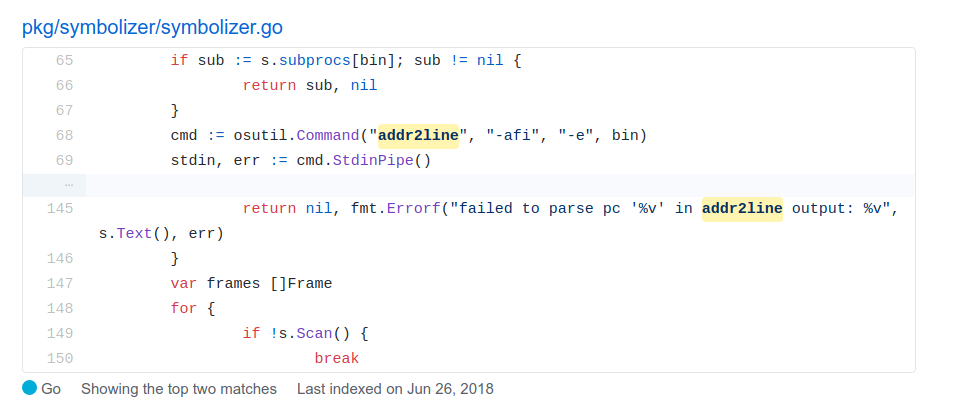
# Syzkaller relies on binutils to extract coverage information
# (see the screenshot below). As we are in a cross-arch environment,
# we should use the aarch64 version of these tools.
# Reference: [https://github.com/google/syzkaller/blob/master/docs/coverage.md](https://github.com/google/syzkaller/blob/master/docs/coverage.md)
mkdir -p ~/bin/aarch64
ln -s `which aarch64-linux-gnu-addr2line` ~/bin/aarch64/addr2line
ln -s `which aarch64-linux-gnu-nm` ~/bin/aarch64/nm
ln -s `which aarch64-linux-gnu-objdump` ~/bin/aarch64/objdump
ln -s `which aarch64-linux-gnu-readelf` ~/bin/aarch64/readelf
export PATH=~/bin/aarch64:$PATH
# Connect your phone and check connected devices
> adb devices
List of devices attached
941AY0HLN7 device
Then create a adb.cfg file under the Syzkaller folder. Take notes that
- Remember to replace the device identifier with the ID that saw in the previous step
- Set
kernel_objto be the root of kernel’s out folder, the one that containsvmlinuxfile - Set
kernel_srcto be the root of kernel’s source code
{
    "target": "linux/arm64",
    "http": "localhost:50000",
    "workdir": "/home/senyuuri/gopath/src/github.com/google/syzkaller/workdir",
    "syzkaller": "/home/senyuuri/gopath/src/github.com/google/syzkaller",
    "kernel_obj": "/home/senyuuri/workspace/bonito_kernel_build_tools/out/bonito-kernel-4.9-android-10/",
    "kernel_src": "/home/senyuuri/workspace/bonito-kernel-4.9-android-10/",
    "sandbox": "none",
    "procs": 8,
    "type": "adb",
    "vm": {
        "devices": ["941AY0HLN7"]
    }
}
Now happy fuzzing : )
senyuuri@senyuuri:~/gopath/src/github.com/google/syzkaller$ ./bin/syz-manager -config=adb.cfg
2020/04/14 22:18:40 loading corpus...
2020/04/14 22:18:40 serving http on http://127.0.0.1:50000
2020/04/14 22:18:40 serving rpc on tcp://[::]:44885
2020/04/14 22:18:40 booting test machines...
2020/04/14 22:18:40 wait for the connection from test machine...
2020/04/14 22:19:26 failed to associate adb device 941AY0HLN7 with console: no unassociated console devices left
2020/04/14 22:19:26 falling back to 'adb shell dmesg -w'
2020/04/14 22:19:26 note: some bugs may be detected as 'lost connection to test machine' with no kernel output
2020/04/14 22:19:26 device 941AY0HLN7: battery level 100%, OK
2020/04/14 22:19:28 machine check:
2020/04/14 22:19:28 syscalls                : 1783/3271
2020/04/14 22:19:28 code coverage           : enabled
2020/04/14 22:19:28 comparison tracing      : CONFIG_KCOV_ENABLE_COMPARISONS is not enabled
2020/04/14 22:19:28 extra coverage          : extra coverage is not supported by the kernel
2020/04/14 22:19:28 setuid sandbox          : enabled
2020/04/14 22:19:28 namespace sandbox       : /proc/self/ns/user does not exist
2020/04/14 22:19:28 Android sandbox         : enabled
2020/04/14 22:19:28 fault injection         : CONFIG_FAULT_INJECTION is not enabled
2020/04/14 22:19:28 leak checking           : CONFIG_DEBUG_KMEMLEAK is not enabled
2020/04/14 22:19:28 net packet injection    : /dev/net/tun does not exist
2020/04/14 22:19:28 net device setup        : enabled
2020/04/14 22:19:28 concurrency sanitizer   : /sys/kernel/debug/kcsan does not exist
2020/04/14 22:19:28 devlink PCI setup       : PCI device 0000:00:10.0 is not available
2020/04/14 22:19:28 USB emulation           : /dev/raw-gadget does not exist
2020/04/14 22:19:28 corpus                  : 0 (deleted 0 broken, 0 too long)
2020/04/14 22:19:30 VMs 1, executed 1, cover 0, crashes 0, repro 0
2020/04/14 22:19:37 vm-0: crash: panic:LINE, dump:LINE
2020/04/14 22:19:37 reproducing crash 'panic:LINE, dump:LINE': 15 programs, 1 VMs, timeouts [15s 1m0s 6m0s]
2020/04/14 22:19:40 VMs 0, executed 1, cover 3144, crashes 1, repro 1
2020/04/14 22:19:50 VMs 0, executed 1, cover 3144, crashes 1, repro 1
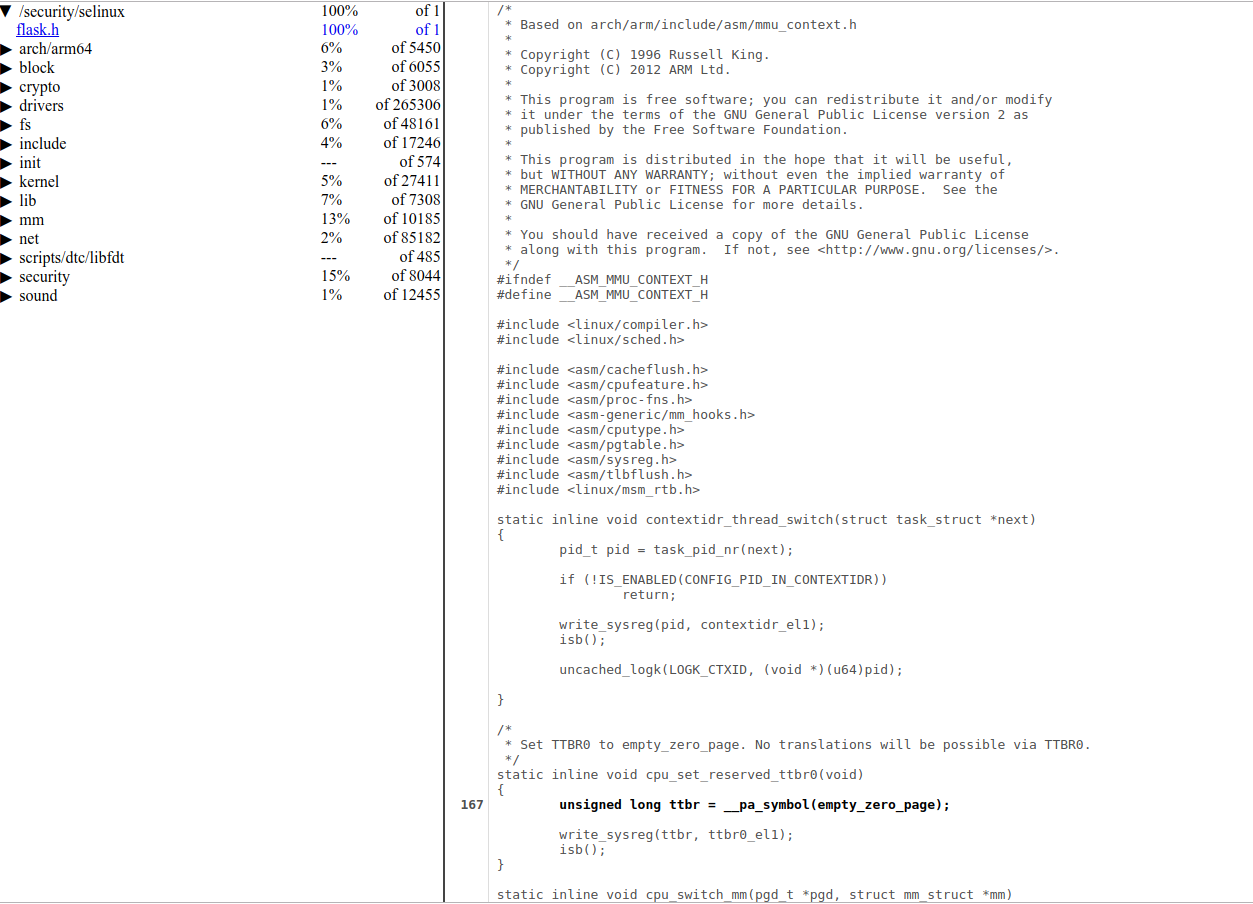
The report is available at http://127.0.0.1:50000.
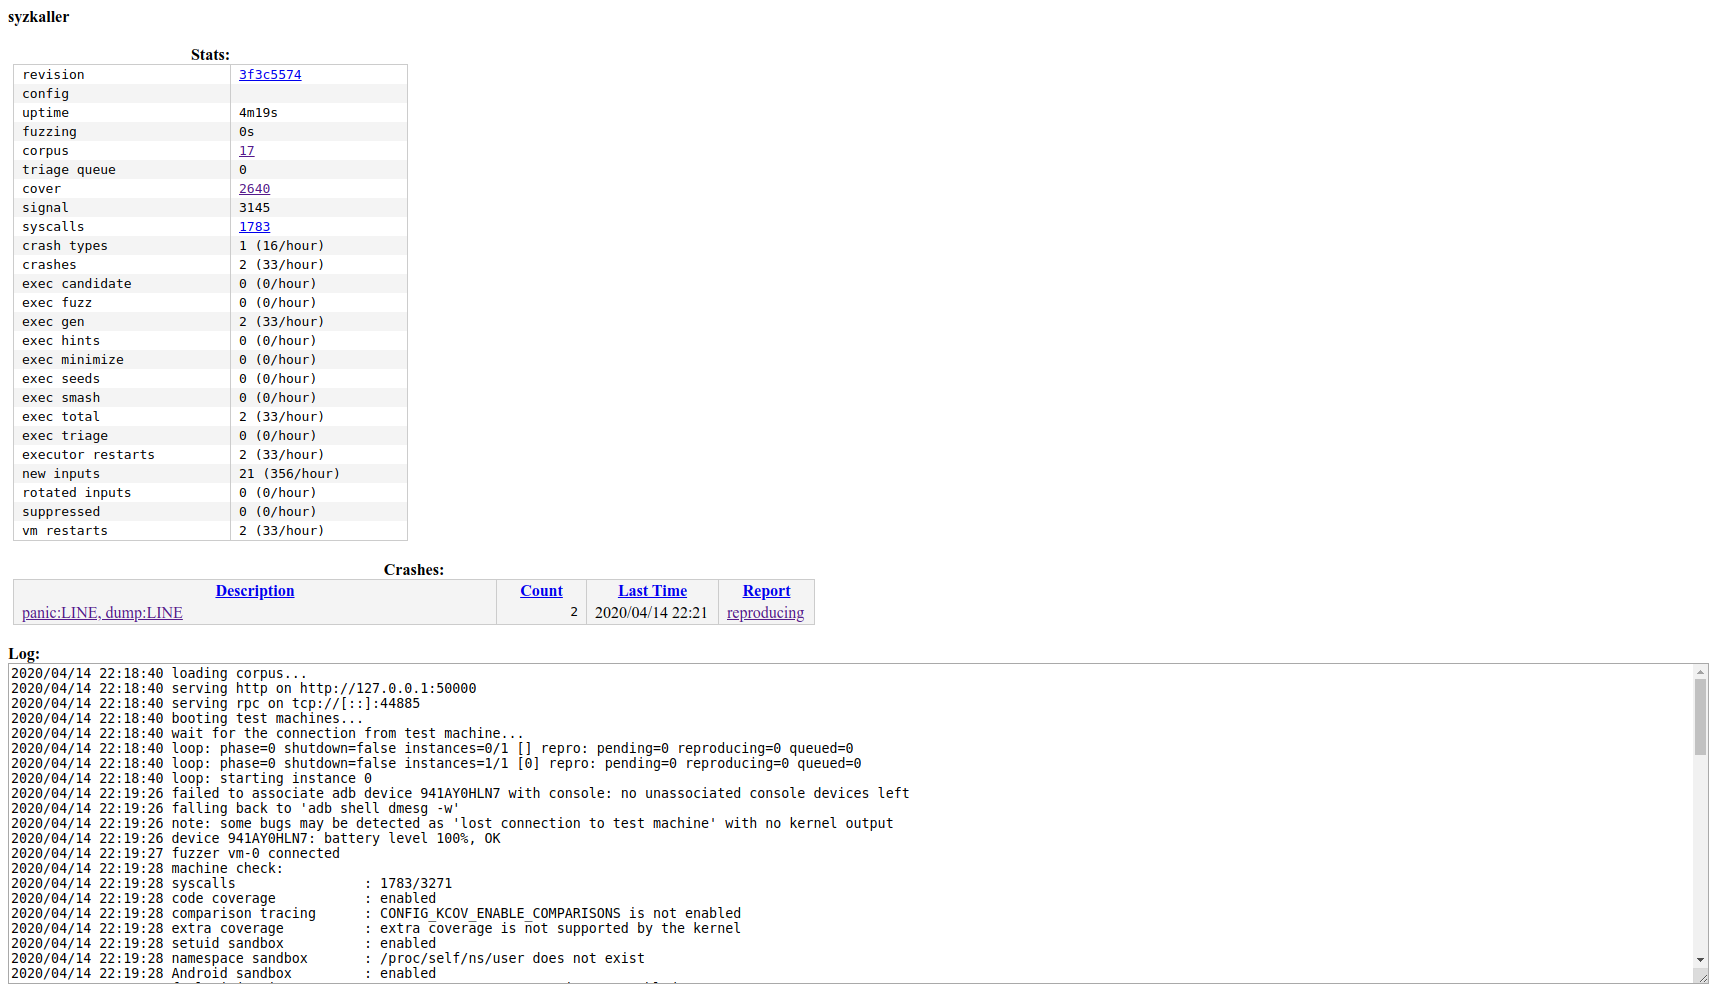
Click on the cover link(http://127.0.0.1:50000/cover) to view the coverage report.